Monday, June 28, 2010

Vanilla Ice-cream


This is a variation of the vanilla pudding. This is easier than the pudding with one less ingredient, gelatin. We do not need the pudding consistency, all we need to do is to freeze the custard and serve. This is an old fashioned kind of home-made ice-cream. This wont be so creamy as the usual ice-creams. This can be made creamy by adding some milk-maid into it.


Ingredients
1.Vanilla Custard Powder- 1/4 cup
2. Milk 3 cup
3. Sugar 1/2 cup
4. Vanilla Essence-3 drops
5. Milk-maid 1/2 tin

1. Keep aside quarter cup of milk from 3 cups and boil the milk(2 3/4 cups)in a heavy bottom pan.

2. Into the kept aside milk, dissolve the custard, store bought. You can use any brand which is available in the market.

3. Add the mixture into the boiling milk and simmer for half an hour. Stir continuously, other wise there are chances of sticking to the bottom and burning.

4. Add sugar, mix well and stir continuously until the milk starts thickening.Add milk-maid. Add the vanilla essence into this and stir, Switch of the flame.Let it cool in room temperature.

5. Pour it into a dish. Keep in the freezer for 3 hours.

6. Ice-cream is ready and can be served with some freshly cut fruits in caramel(reduced sugar) syrup.

Variations: can be done by using different types of custard available in the market like strawberry, mango, mixed fruit or any other types of custards and replacing the essence accordingly with strawberry essence, orange, pine apple, mango or mixed fruit essence.

Vanilla Pudding


Ingredients
1.Vanilla Custard Powder- 1/4 cup
2. Milk 3 cup
3. Sugar 1/2 cup
4. Gelatin- 1 packet
5. Vanilla Essence-3 drops

1. Keep aside quarter cup of milk from 3 cups and boil the milk(2 3/4 cups)in a heavy bottom pan.

2. Into the kept aside milk, mix the custard, store bought. You can use any brand which is available in the market.

3. Add the mixture into the boiling milk and simmer for half an hour. Stir continuously, other wise there are chances of sticking to the bottom and burning.

4. Add sugar, mix well and stir continuously until the milk starts thickening.Add the vanilla essence into this and stir, Switch of the flame.Let it cool in room temperature.

4.Into 1/4 cup of cold water add, the gelatin and let it stand for 10minutes.

5. Into gelatin, add 1/2 cup hot water and mix and dissolve.

6. When the custard mixture has cooled, add the gelatin into it, mix well and pour it into a dish. Keep in the freezer for an hour. Then take it out and keep it into the refrigerator for 2 hours.

7. Pudding will be ready and can be cut into desired shapes. Can be served with some freshly cut fruits in caramel(reduced sugar) syrup.

Variations: can be done by using different types of custard available in the market like strawberry, mango, mixed fruit or any other types of custards and replacing the essence accordingly with strawberry essence, orange, pine apple, mango or mixed fruit essence.

Varutharach Chicken Roast (Chicken Dry Roast in Coconut-fried paste)


Ingredients
1. Coconut Oil-2tsp
2. Grated Coconut-1/2 cup
3. Shallots(ulli)- 6
4. Curry leaves- a few
5. Ani seeds(perinjeerakam)-1/2 tsp
6. Turmeric Powder- 1/2 tsp
7. Chilly powder- 2 tsp
8.Coriander powder- 1 tsp
9. Garam masala-1/2 tsp
10. Onion- 1
11. Tomatoes- 1/2
12. Ginger-Garlic Paste- 2tsp
13. Chicken - 1/2 kg
14. Slit Red chillies- 2


1. Heat 1 tsp oil and add the grated coconut,3 chopped small onions(shallots), ani seeds and 2-3 curry leaves.

2. When half fried add turmeric powder,chilly powder, coriander powder and 1/4 tsp garam masala. Fry till dark-brown. It must be fried properly till crispy powder form.

3. In a blender, add this mix and blend it to a fine paste with some water. Keep aside

4. In a pan, add sliced onion, tomatoes, ginger garlic paste, till onion turns translucent.

5. Add garam masala and saute well.

6. Add chicken and the ground paste into this and coat them well with the mixture.

7. Add enough water to the level of chicken to dip. Add enough salt. When it starts boiling, keep the lid closed and let the chicken cook well.

8. Once chicken gets cooked, keep the lid open and reduce the water to nill. When it has fully dried, switch off the flame.
9. Heat some oil in a pan, add slit red chillies, 3chopped small onions and lots of curry leaves. Fry for a minute.

10. Pour this into the curry


11. Serve hot with kerala rice.


Naadan Easy Chicken Curry with Coconut milk


Ingredients
1. Chicken-1kg
2. Red Chilly Powder-11/2 tbsp
3. Turmeric Powder-1/4 tsp
4. Coriander Powder-3 tsp
5. Pepper Powder- 1 tsp
6. Garam masal-1 tsp
7. Cardamom Powder- 1/4 tsp
8. Oil- 2tbsp
9. Ginger-Garlic Paste-2 tsp
10. Onion,sliced-3
11. Green chillies- 2
12. Coriander leaves, a few
13. Curry leaves- a few
14. Tomato Pieces- 1
15. Aniseeds(perinjeerakam)-1/2tsp
16. Salt

1. Clean the chicken and cut into medium pieces.

2. Marinate chicken with chilly powder, turmeric powder,coriander powder,pepper powder,garam masala, salt and cardamom powder for an hour.

3. Heat oil in a pan, add sliced onion, green chillies chopped and some curry leaves.

4. Add ginger-garlic paste and saute till onion gets translucent.

5. Add chopped tomato. Saute till soft.

6. Add aniseeds and saute.

7. Now, add marinated chicken pieces into this and mix well with onion mix and stir for 2 mnts.

8. Now transfer this into cooker and add 1/4 cup water mixed in 1/4 cup coconut milk. Mix well and cook for 4 whistles in medium flame. Now chicken will be well cooked and very very soft.

9. Open the lid and see whether the gravy is thick. If not, reduce the water content by keeping the lid open either in the cooker or in the wide pan. Finally, sprinkle some coconut oil on top and garnish with curry leaves and coriander leaves. Typical naadan chicken curry can be served best with kappa , parotta or kerala rice.


Wednesday, June 23, 2010

Pav Bhaji


Ingredients
1. Potato-2
2. Carrot-1
3. Beans-5
4. Green Peas- 1/4 cup
5. Butter- 4 tbsp
6. Tomato- 1/2
7. Onion- 1
8. Grated ginger- 1/2 tsp
9. Green chillies-2-3
10. Cilantro/ Coriander leaves, a few
11. Turmeric powder- 1/4 tsp
12. Cumin seeds- 1/4 tsp
13. Pepper powder- 1/4 tsp
14. Salt, to taste
15. Coriander powder, a pinch
16. Dried methi leaves/kasuri methi crushed-1/2 tsp
17. Heeng/asafoetida/kaaya podi- a pinch
18. Garam masala- 1/4 tsp
19. Lemon Juice-1 tsp
20. Bun/ Bread- 5-6 slices cut into half.


1. Cook all the vegetables from 1-4.

2. In a pan, heat 1 tbsp butter, add tomatoes,onions, ginger, green chillies and cilantro. Saute till onion and tomato becomes soft. Mash it properly.


3. Add turmeric powder, cumin seeds, pepper pwder , salt, coriander powder, kasuri methi and asafoiteda. Saute for 3 minutes.

4. Mash the cooked vegetables and add into the pan. Mix with other ingredients and mash it well to a medium paste.

5. Add 2 tbsp of butter and cook for 3 minutes.

6. Add some tsps of water and mix well, so that it does not dry out and stick to the bottom.

7. Add little garam masala, if desired.

8. Add lemon juice, mix well.

9. Garnish with coriander leaves.


10. Slice the bun/ bread(Pav) into desired size and shape. In 1 tbsp butter in another pan, toast the bread till light brown.

10. Serve hot with the bhaji (cooked vegetable mixture) along with some chopped onion and lemon wedges.

Tuesday, June 22, 2010

Pizza


1. In a bowl, take around 250ml of warm water and put 7 gms(1 pkt) yeast, 1 tsp salt, 1/2 tsp sugar, 1 cup of flour and mix well. Keep aside for 10 mnts.

2. Into this add a tsp of olive oil and mix well. Make a very smooth dough and keep aside fermentation in a warm place covered in a moist cloth for 3-4 hrs.

3. After 1 hr, take this out and punch and remove the air inside which would have come during the puffing up of the dough. Again keep it for fermentation.

4. Now, put a lot of flour on a flat surface and flatten the dough, a little thick on the sides and thin on the surface.

5. Take the pan on which you are planning to grill the pizza. Spread the dough evenly on that. Let it rest for 10minutes.

6. Then spread the sauce as per your need, tomato(see my recipes) or white sauce(see my recipes). Then the sliced vegetables and meat on top of it.

7. On top of it, spread a lot of italian-parmesean cheese finely shredded and cover the whole pizza top.

8. Sprinkle a little olive oil on top and brush the sides also with oil.

9. Pre-heat the oven for 475 degrees and keep the pizza for 10minutes. When the cheese top becomes nice golden brown color, take it out.

10. Rest it for 10mnts and pull it out from the pan.

Courtesy: Manjula's Kitchen

Friday, June 18, 2010

Ulli-Mulak idich Chicken(Chicken with crushed shallots and red-chillies)


A typical kerala dish which goes well with kerala rice or kappa/tapioca.

Ingredients
1. Shallots 1o
2. Red chillies 2
3. Ginger-Garlic paste 2 tsp
4.Garlic cloves 2
5. Garam masala 1 tsp
6. Pepper powder 1/2 tsp
7. Chilly powder 2 tsp
8. Turmeric powder 1/2 ts
9. Salt
10.Chicken 1/2 kg
11. Coconut oil 1 tbsp
12. curry leaves, a few

1. Crush both shallots and red chillies together with a little salt to make the crushing easier.

2. In a pan, add some coconut oil and add the crushed mixture into it. Saute for a minute.

3. Add all the other ingredients except chicken and mix well.

4. Once the raw taste of the spices go, add chicken and mix well.

5. Once the chicken gets coated well with the spices and shallots, add a cup of hot water and mix.

6. Let it it boil. Then, simmer and cook the chicken till done.

7. If any water is leaft after the chicken is well cooked, keep the flame high and cook keeping the pan open. Reduce the water completely.

8. Garnish with lots of curry leaves. Serve hot with boiled chemba/kerala rice and pulishery.

Goes well with boiled kappa/Yuca-Root/Tapioca also. Spices can be added more when served with kappa.

How to make Pani for Pani-Puri


The most common street food in North India is Pani-Puri. Not only Northies, almost everybody in and outside India like to have this food any time. We usually have this as an evening snack. I make both puri and pani at home. The recipe for puri will be posted soon.

Ingredients
1. Tamarind paste 2 tsp
2. Coriander powder 1/2 tsp
3. Cumin powder 1/2 tsp
4. Salt
5. Pepper powder 1/2 tsp
6. Chilly powder 1/4 tsp
7. Sugar 1 tsp
8. Water 3 cups
9. 1 Green chilly, some Mint leaves and coriander leaves crushed paste 1 tsp

1. Mix togather ingrediants from 1-8.

2. Once its properly mixed, add the green chilly-mint and coriander leaf paste. Mix well.

3. Serve with the puri home made or store-bought.

Usually, Puris are eaten by cracking at the center and dipping into the liquid filling the liquid inside the puris. This can be best served with some chopped tomatoes, cubed cooked potatoes, coriander leaves or cooked salted kabuli chana and finally dipping into the pani.
Pani can be stored in fridge for almost a month or more. When you prepare this, make a jar full. Puris can be made at the time of eating. A quick evening snack.

Easy Style Chicken Biriyani

This is an easy version of Chicken biriyani. Typical Biriyani made in Kerala is posted among Kerala cuisines. This is amethod in which you don not have to stand and cook at the stove. Just mix everything and keep in a deep vessel and cook till done thats it, no ccoking skill is needed for this version. For those who are busy working or too lazy to cook can easily try this version of preparing delicious biriyani which tastes the same as the typical biriyani.

Ingredients
1. Chicken 1/2 kg (6-7 pieces)
2. Green chillies 3 chopped
3. ginger garlic paste 2 tsp
4. Pepper Powder 2 tsp
5. Ani seeds/ Fennel seeds (Perinjeerakam) 1/2 tsp
6. Chilly Powder 1 1/2 tbsp
7. Turmeric powder 1/2 tsp
8. Cumin powder 1/2 tsp
9. Salt
10. Coriander powder 1 tsp
11. Garam masala 1 tsp
12. Yogurt (curd) 3 tbsp
13. Onion sliced 2 1/2
14. Rice(Basmati) 1 cup
15. Oil
16. Whole garam masala pieces 2 each from cloves, cinnamon and cardamom.
(patta, gramb,elakka,)
17. Cashew nuts and raisins
18. Ghee 2 tbsp

1. Wash and soak rice in normal water for 3o minutes.

2. Boil 3 cups of water and add a drop of oil, salt and the whole garam masala pieces.

3. Once its well boiled, add the soaked rice after draining the water.

4. Cook till half done. remove immediately from flame and drain.


5. Mix all the other ingredients together except half the onion,ghee and cashews/raisins and keep aside.


6. in a heavy bottom deep vessel,pour 2 tsp oil and add the chicken mixed with all the ingredients and level it properly flat into the vessel.


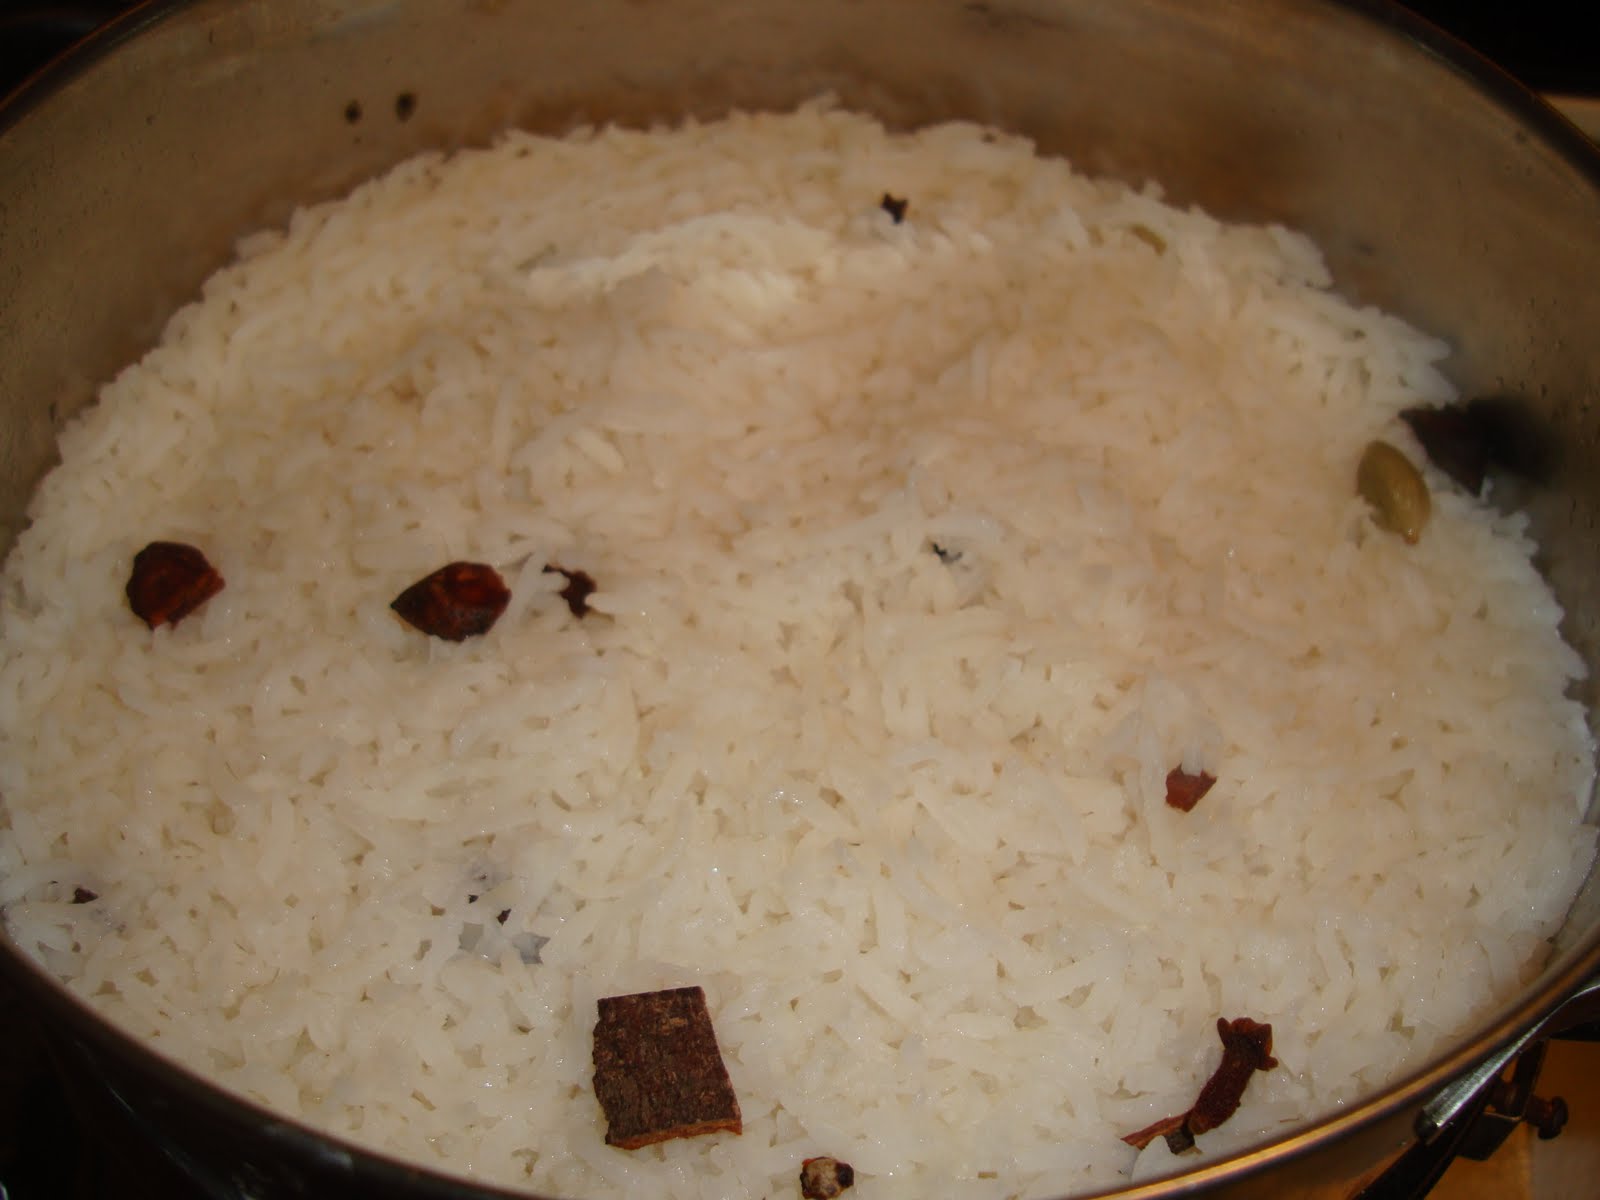
7. On the top, spread the half-cooked rice evenly.

8. In a pan, add the ghee and fry the kept-aside onion, finally add the cashews and raisins.

9. Pour this on to the top of the rice.


10. Cover it very tightly so that no steam/moisture escapes from the vessel.

11. Cook for 30 minutes,5 minutes in high flame, 15 minutes in medium flame and 10 minutes in very low flame.

12. By the time, u open the vessel after 30 minutes the spicy delicious biriyani will be ready. it will start smelling nicely by 25 minutes of cooking and you will know the biriyani is almost done.

13. Mix the rice evenly with chicken after transferring this into a wide mouthed pan, otherwise the rice will get mashed up.

14. Serve hot with raita, pappad and lime pickle.

Tips and Tricks:
At the first stage, do not over cook rice, stop cooking while rice starts becoming larger and gets broken while rubbed with your fingers. While rubbing if its too much cooked, it will get mashed like cooked potatoes.
Use a very heavy bottom pan, other wise it will get burned at the bottom which will spoil the whole biriyani. If are not confident enough about the pan, you can keep another heavy bottom wide-mouthed pan below it and keep this cooking vessel over it, after the first 5 minutes.
Donot use a wide open pan. It must be deep enough to seat the chicken gravy and rice and small mouthed vessel helps keep the moisture inside than a wide one.


Do not allow any moisture to escape from the vessel. Most of the lids will have a hole for the steam to escape. To make sure that there is no moisture lost, keep a kitchen towel, cotton or any kind of cloth in between the lid and the vessel. On top of the vessel this must be spread so that the whole vessel-top is covered like a lid and then on top of this, keep the lid. No steam will be escaping at this point and moisture will be retained and you will get well-cooked chicken and biriyani.

Courtesy:vahrevah.com

Vegetables in Thai Curry Sauce


The food from Thailand is really amazing, especially for us keralaities. They prepare most of their dishes in coconut milk. Not too spicy, but very very delicious. I feel its an upgraded version of Chinese cuisines. Here (In USA) 10 miles from our home, there is a very nice restaurant named 'Bangkok' which serves the most delicious Thai cuisines. The main dishes include Fried rice in Thai curry sauce and Chicken or Veggies in Coconut curry sauce. Every weekend me and my husband enjoy being there. To reduce the frequency of the visit I thought finding out the exact recipe and could successfully do it at home. Here, a vegetarian version of the Thai curry sauce with mushrooms and bell peppers (Capsicum). Maximum cooking time for this dish is 5 minutes.

Ingredients
1. Curry Powder 1/2 tsp
2. Pepper Powder 3/4 tsp
3. Crushed Chili Powder 1 tsp
4. Olive Oil/Vegetable Oil/Canola Oil 1 tbsp
5. Half the onion cut into long thin slices
6. Green chillies chopped 1
7. Garlic cloves 2
8. Unsweetened Coconut Milk 1 1/2 cup
9. Cornflour 1 tsp
10. Grated ginger 1 tsp
11. 6 White Button Mushrooms cut into one-forth
12. Half of a Bell Pepper (Capsicum) cut into long thin slices
13. Half a Carrot cut into long thin slices

1. In a pan, add oil. Then add garlic and curry powder. Saute it for few seconds.

2. Add chilli powder, chopped green chillies. Saute.

3. Add onion, bell pepper and mushrooms. Toss well till mushrooms start becoming soft.

4. Add the coconut milk and let it boil.
5. Add pepper powder and grated ginger.

6. Now at this point, add cornflour mixed in a tsp water into it. When it starts becoming like sauce. Switch off the flame. Serve hot with steamed rice or fried rice.


Tips:
Do not cook mushroom too much, just it have to start becoming soft. It must be still stiff.
The whole cooking must be done in high flame. The cooking time will be maximum of 5 minutes.
This is a very easy dish and very very tasty. The same sauce without veggies can be added into the normal fried rice before adding other sauces like soy and chili into it. That is served as Fried Rice in Thai curry sauce in their restaurants.
The non veg version of this dish can be done with the same procedure, at the time of adding the vegetables,cooked meat can also be added and tossed together.

Thursday, June 17, 2010

Sharkara Ada Pradhaman


Ingredients
1. Sarkara (Jaggery) 1 cup
2. Coconut Milk 1 cup
3. Ada 3/4 cup
4. Cardamom Powder 1 tsp
5. Cashew Nuts and Raisins, a few

1. In a heavy bottom vessel, add 3 tbsp water and add sarakara. Let it liquidify in low flame.

2. Drain the liquid thru a clean cotton cloth. Do this two times till all the dirty particles from the jaggery is removed.

3. Boil 3 cups of water,add a drop of oil and add the washed ada into it. Ada can be washed in running water. Once ada is cooked wash it again under running water to remove the oil on it.

4. Into a heavy bottom pan add the jaggery and cooked ada. Stir continously since there are chances of jaggery sticking to the bottom.

5. After 5 minutes, add half the coconut milk mixed with water(randam pal) and simmer for 10 minutes.

6. When the raw taste of the coconut milk goes, add the thick coconut milk(onnam pal) and cardamom powder.

7. Fry cashews and raisins in 1 tbsp ghee and pour it into the payasam. Serve after the sadya (feast) with pazham (banana) and pappadam (pappad).

Do not add too much water into the jaggery, it will lead to lot of cooking time to make it into thick consistency.
Ada must be washed properly after cooking, otherwise the oil on it will spoil the dish by curding the coconut milk.
This goes best with pazham (banana) and tastes better when there are cashews and raisins in it.
Add Image

Palada Pradhaman


Ingredients
1. Ada - 1 cup
2. Milk - 3 cup
3. Sugar - 2 cup
4. Cardamom Powder- 1/2 tsp
5. Oil, very little
6. Cashew nuts and Raisins, a few


1. Wash the ada in cold water first, then in hot water.

2. Into the cooker, add water, a drop of oil and ada. Let it whistle one time.

3. Then wash ada properly under running water to remove all the oil on its surface.

4. Wash the cooker properly to remove any signs of oil in it.

5. Now, into the cooker add milk, washed ada, sugar and the cardamom powder. Keep in medium flame.

6. After the first whistle, put the flame to simmer and let it whistle for 1 more time.

4. Milk will be thick enough for the consistency of payasam, in case its not thick pour it into a heavy bottom wide mouthed pan. Simmer and keep stirring.

5. In a pan, add 1 tbsp ghee and fry the split cashews and raisins. Pour this into the payasam. Serve after a wonderful sadhya(feast) with pazham(banana) and pappadam(pappad).

I used store-bought ada which is a little thick. So the number of whistles will depend on the amount of cooking needed. If you are using home-made or thin ada, the time for cooking can be less. Check after the second whistle and then again cook only if required.

Those who do not like ghee and nuts, the last step can be avoided. Without them also the payasam will turn to be very very delicious.

Semiya/Vermicelli Payasam

Ingredients
1. Semiya/Vermicelli 1 cup
2. Sugar 1 cup
3. Condensed milk(sweetened) 1/2 a tin (optional)
4. Milk-3 cups
5. Cardamom powder- 1/2 tsp
6. Cashews,Raisins- afew
7. Ghee- 2 tbsp

1. Boil milk and add semiya into it.

2. Simmer till semiya cooks(become very soft and mashed up when rubbed up with fingers). It will double its size when fully cooked.

3. By this time, milk will get reduced to half. You can make it sure when milk turns pale yellow in color.

4. Now, add sugar and let it simmer for 5 minutes.

5. Add milk-maid and simmer for 3 minutes. Stir well.

6. Fry cashews and raisins in the ghee and add into this. Serve after lunch/feast.

Vermicelli payasam can also be eaten as a pudding by keeping it in the refrigerator for 3-4 hrs. Its also very very delicious.
Milk-maid is completely optional. This makes the milk thickening a little easier,so the cooking time and standing at the stove time can be reduced. Depending on the sweetness of the condensed milk, sugar can be adjusted to your taste.
In case you are not adding the condensed milk, increase the amount of sugar to 2 cups.

Wednesday, June 16, 2010

Easy Strawberry Pudding


Ingredients
1. Strawberries, cut and mixed in sugar syrup
2. Gelatin/Pectin 1 packet
3. Hot water 1/2 a cup
4. Ice water 3 tbsp
5. Whipping Cream 5 tbsp
6. Egg white of 2 eggs

1. Cut and clean the strawberries and mix with enough sugar till the sugar melts into it.
(You can also use store-bought sugared strawberries, available in Wal-mart/Meijer in USA.)

2. Crush the strawberries with hands and keep aside.

3. Dissolve the gelatin/pectin, in ice water and keep aside till the whole substance dissolves in the water.

4. Once done, add some hot water into it and mix well,until no particles are left.

5. Separate the egg white from the egg and beat it into a foam-like consistency.

6. Add the gelatin mix into the stawberries and mix thoroughly.

7. Add whiiping cream and stir in a folding manner until no white particles are left.

8. Fold in the egg white mixture into this. Folding must be done very very softly. This makes the pudding soft and silky.

9. Pour the mixture into a refrigerating dish and refrigerate for an hour. Then freeze for 1 or 2 hrs and can be cut into equal squares and served with some strawberry pieces.

Gelatin/Pectin is a thickening agent. Gelatin is an animal product while Pectin is made from plant. Its always safe to use Pectin. Gelatin is not preferred for children under 5 yrs.
Beating the egg white can be made easier with a egg beater or a whisker. At home wee can make it very easily even with a fork, by taking the egg in a wide mouth glass vessel and beat it for 5-10 mnts with a fork continuously. Egg will turn like the detergent foam.

Courtesy: LakshmiNair,Magic Oven@KairaliTv

Mango Ice cream (A very easy method)

Ingredients
1. Mango pulp 1 tin
2. Whipping cream 1/2 cup
3. Milk Maid 1/2 tin


1. Into the mango pulp add milk maid and mix well.
2. Slowly add the whipping cream spoon by spoon and mix gently.

3. Once its mixed well and no signs of white particles are left, pour this into a refrigerating container and freeze for 3-4 hrs.
4. Serve scoops of yummy mango Ice-cream with some mango slices and a squeeze of whipping cream on top.

Kozhi Porichath/Chicken Drumstick

Ingredients
1. Chicken Legs 4
2. Ginger Garlic Paste 1 1/2 tbsp
3. Chilly Powder 1 tbsp
4. Garam Masala 1 tbsp
5. Pepper Powder 1 tsp
6. Lemon juice/Vinegar 1 tbsp
7. Rice Powder 1/2 tsp
8. Salt 3/4 tsp


1. Mix together all the ingredients except chicken.

2. When it turns to a fine thick paste, add the chicken legs into it and mix well. Each and every leg must coat well with the spice paste,if it has some wedge-like or opening on the leg,press the paste into it and coat the legs completely. Keep aside for 3 hrs.

3. Heat oil in a pan and deep fry the chicken pieces into dark brown color.

4. While serving squeeze some lemon juice on top of it and garnish with some lemon wedges and coriander leaves.

Vegetable Clear Soup

Ingredients
1. Vegetables as per your wish
Green Beans, cabbage, Carrot, Celery, Spinach etc will go good with this soup.
2. Milk 3 tbsp
3. Cornflour 2 tsp
4. Salt
5. Pepper powder 1/2 tsp

1. In a deep vessel, pour 3 cups of water and add all the vegetables, add some salt and cook till the vegetables starts becoming soft.(Boil for 20 mnts)

2. Now the water will have all the essence of the vegetables. Switch off the flame and drain through a sieve. Rub all the vegetables together on the sieve 5-6 times.

3. If you like to bite the vegetables in the soup add these back into the soup or those who want a clear soup can just discard the veggies. But keep in mind that its always better to have the vegetables also.

4. Now keep this back onto the stove and let it boil.

5. Mix the milk and cornflour together and add this into the boiling soup and keep stirring in low flame.

6. Once it attains a thick consistency, switch off the flame. Sprinkle some pepper powder.

7. Serve hot with chili or green chillies-vinegar sauce and some fried bread cubes.

Chili Chicken


A dish which kids as well as grown-ups love to eat. This can be served as a starter item as well as a side dish with the main courses like Fried rice, Chapathi, Parotta, Naan or just steamed rice. This is made in three steps which includes frying the chicken and then making the sauce and finally coating the chicken well with the gravy.

Ingredients
1. Chicken cut into small pieces, boneless or with bone: 1/4 kg
2. Eggs beaten well-2
3. Cornflour- 1 1/2tsp
4. Soysauce- 2 tbsp
5. Salt
6. Pepper-1 tsp
7. Ginger-Garlic Paste- 1tsp
8. All purpos flour/maida- 2tsp

For Sauce:
9. Onion chopped -3
10. Onion diced-1
11. Half Capsicum/Bell pepper diced
12. Green chillies minsed-6
13. Garlic minsed-7
14. Chilly powder-1 tsp
15. Vegetable Oil/ Canola Oil/ Olive oil- 3 tbsp
16. Oil for frying chicken
17. Celery- 1/2 a cup chopped
18. Spring onion-1/4 cup chopped
19. Soysauce- 1 tbsp
20. Chilly sauce- 3 tbsp
21. Sugar- 1/4 tsp
22. Cornflour- 2 tsp

1. Mix all the ingredients from 1-8 and keep aside for half an hour and deep fry them in hot oil.

2. In a pan, pour 3 tbsp oil. Add ginger garlic paste,garlic and green chillies. Saute for some seconds.

3. Add chilly powder and pepper powder,saute for a minute and then add chopped onions. Saute till transparent.

4. Add half the celery and half the spring onion. Saute for a minute.

5. Add soysauce and chilli sauce.

6. Add sugar and two glasses of water. Keep the lid closed and let it boil.

7. Once boiled, add the diced onion, bell pepper and the fried chicken.

8. Keep the lid closed till the diced onion starts becoming transparent.

9. Now, keep the lid open and mix well the chicken in the sauce.

10. Any sauce or pepper powder or salt, if needed can be added to the gravy at this point.

11. Now add 2 tsp cornflour mixed in 3 tsp water into this.

12. Now the gravy will start thickening. Stir well, otherwise there are chances of cornflour forming lumps.

13. Switch off the flame when the gravy reaches the right consistency you want. If you are serving it as a starter let all the water content dry and only the chicken and the onion remain. Granish with the rest of the celery and spring onion.

14. Serve hot with fried rice or chapathis. Serve with a tooth pick pierced into each chicken piece when served as a starter.

Courtsey: webindia123.com

Gajar Ka Halwa (Carrot Halwa)

This is a common dish done by North-Indians. But my mother do it in a different way which I loved to eat once back from school. Now I also follow the same procedure what she used to do and it comes out the same way....YUMMY, YUMMY ,YUMMY.


Ingredients
1. Carrot 2 cups
2. Milk 1 1/2 cup
3. Ghee 3 tbsp
4. Nuts, any of your choice to garnish
5. Cornflour 1 tbp
6. Sugar 1 1/2 cup
7. Cardamom Powder 1/2 tsp


1. Cook the diced carrot till soft. (In cooker, just 2 whistles).

2. Drain and keep aside till it cools down.

3. In a blender,grind the carrot with one cup of the milk into a thick paste.

4. Heat a heavy bottom pan and pour 2 tbsps of ghee.

5. Pour the blend mixture into the pan, pour the rest of the milk except 2 tbsp and keep stirring.

6. Stir continuously since there are chances of sticking to the bottom.

7. When the raw taste goes or when it reaches a medium consistency and when it starts coming easily from the pan, add sugar.

8. Pour 2 tbsp milk mixed with the cornflour into this.It will start becoming thick, Keep on stirring without taking your hands, while it becomes a halwa consistency(shown in the picture below), switch off the flame and pour the rest of the ghee on the top and the cardamom powder before the final stir.

9. Grease a plate with some ghee and pour this mixture (when its still hot) into it and flatten it well into it. Garnish the top with some nuts, cashews or badams. Keep in room temperature and let it cool down.

10.When cooled cut into equal square pieces and can be enjoyed with vanilla ice-cream or just the halwa. Its very very delicious.


More the milk you add, more the cooking time will be. So keep in mind that, milk is enough only to grind the carrot and a little to pour into the pan with the mixture.

Easy Cake Pudding


If you have any left over cake or the cake that doesn't taste good, you can easily turn it into a delicious cake pudding in 5 mnts. I bought some marble cake thinking its good, but the cake some how didn't taste as the usual marble cake and no one even looked back into this after the first bite. So i thought making something out of it with what i have in my kitchen. With the left over cake and ice-cream and some fruits and nuts, I tried out a recipe which turned out really delicious after a spicy dinner. We started buying different cakes and different ice-creams to make this irrespective of the taste of the cake.

Ingrediants
1. 5-6 slices of cake
2. 4 scoops of Ice-cream
3. 5-6 strawberries or any fruits of your choice , cleaned and cut into half and mixed well with sugar until sugar dissolves
4. Cashew nuts/ Almonds or any kind of nuts of your choice, grated or whole.

1. Melt the ice-cream into liquid using a microwave oven or just keeping it outside for 30 mnts.

2. Soak the sliced cake one bye one in the ice cream till it becomes very soft and the cake is fully loaded with ice-cream.

3. Place a slice of cake in a dish,on the top of it place one or two pieces of strawberries in the center of the slice, and the nuts on the sides. Repeat the same procedure for all the slices.

4. Refrigerate (do not freeze) for an hour or two.

5. The delicious pudding is ready.Cut from the top into all the slices and serve a piece as a layer of cake.

You can select any cake or ice-cream for this recipe, keep in mind that the contrast combination will taste good and never be boring even when eaten a lot.
Vanilla/ Marbel Cake with Choclate Icecream, Strawberry, Mango and even Vanilla Ice cream will be good and Choclate Cakes with vanilla Ice cream. When you use one type of cake,use the other type of Icecream. Vanilla Icecream will go good with most of them.